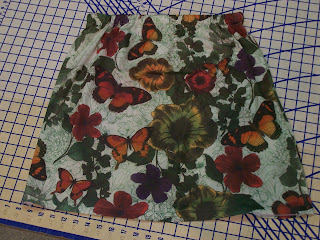
I am tired of my shorts riding up when I am working in the gardens, so I thought, a knee length skirt should work just as well! But after shopping and shopping (which I detest - well, clothes shopping) I realized I needed to just make my own.
After a few quick searches of the Internet, I came across a great blog that gives instructions on making skirts out of SHIRTS! Just my cup of tea!
Off to a local store to find some inexpensive shirts that I could put to good use. I purchased plain t-shirts for work skirts and some fancy t-shirts for every day wear!
Here is what I did...not exactly step by step, but you will get the idea and I will also link to the blog I found that inspired me.
First, find a shirt you like - that when you hold it up to you, will make the length skirt you desire. If you like it, and it is super inexpensive ($3-5), I say buy it! Better yet - go to your local thrift stores!

When I got home I washed and dried the shirts, just as I will once the final garment is done.
I laid the shirt out flat on my cutting board. Measured from my waist to where I want the hem to fall (just above the knee in this case) - and added one inch for seam allowance.

At the 21" mark, I cut across the shirt, trying to cut as straight as possible, just at the bottom of the sleeves. Since I am not a pencil, I wanted my skirt a bit longer which meant I had to cut a bit through the bottom of the sleeve. I turned the shirt inside out and ran a seam at the "armpit" to close it up so that the cut shirt was now just a tube.

Carefully folding the edge over to make a 1" seam, I pinned the shirt all the way around, making sure there would be enough room for the elastic later.
Stitch all the way around, but leave one inch of seam undone - so you have room to thread the elastic through. Make sure that you have thread that matches!! My first skirt, I didn't bother filling a new bobbin, and when I had almost finished sewing, I realized I would have a white seam on my brown skirt...on the outside! Oops! Oh well, it is for working in the garden. Who will see it, right?

I hooked a LARGE safety pin through the end of the elastic (in order to measure the 3/4" wide, no roll elastic, I held it around the part of my waist where I would wear the skirt, pulled it a bit snug, and cut the elastic allowing for a one inch overlap.). Thread the safety pin around the tube you created at the top of the skirt. It takes a bit of time and patience. Make sure the elastic doesn't twist. When you come back to the end, pull both ends out as far as you can. I pinned the ends, overlapping about one inch, then sewed over the ends and around in a box and then across the box - last thing I need while in the garden, is for the elastic to snap and my skirt to drop! Would NOT be good. Then I fed the skirt back through the machine to close up the slot where I threaded the elastic through.
Et Viola! A brand new skirt!

Here is the blog that inspired me The Shirt Skirt
Check it out!
