Saturday, November 28, 2015

Broomcorn Processing

This summer I was lucky to be able to attend a few Folk School classes at Historic Cold Spring Village which is just about 2 miles down the road.  It was a new program for the Village and I tried to take full advantage of it.  The first class I participated in was book making.  I got to make 3 small projects the first class and was invited to start a more complicated book the following week.  I will write that up separately... The second class was on broom making!  It was fantastic.  I had a wonderful instructor and was taught how to make a whisk broom and a cob-webber.


My awesome instructor and a hen supervisor.
I was very proud of my two brooms and immediately thought of my friends over at No Frills Farm - they groom BROOMCORN!  I got home and messaged the farmer there, Charles, to ask if he was growing any this year.  He was!  What luck!  So I told him I'd like to place an order for as much as I can get, maybe 100 pieces.  When the fall came and they began harvesting, I reminded him of my order and volunteered to help harvest what I needed.  One Sunday morning I drove to the farm and we headed out to the back field to clip away.  I came home with almost 200 pieces!  I was super excited.  Then the realization that I had to take all the seeds
off sank in.  That was an awful lot of seed.


Broomcorn awaiting processing.


A few quick searches on the internet and I had devised a plan.  I gathered up my materials - a nice big plastic bin for catching the seeds and two combs, left over from my pony showing days - mane combs!  After setting myself up, I decided to video it.


Deseeding the broomcorn.
All deseeded.


I finished up the other two colors of broomcorn today. I just used the metal pulling comb, as it is more efficient.  Now I am letting them dry out a bit before I begin practicing! Don't worry!  I will be documenting the entire process.


A little broomcorn fact for you: Broomcorn is not actually corn!  It is a type of sorghum, Sorghum vulgare var. technicum, that produces long fibrous seed branches, making it a perfect choice for making brooms.  For further information on broomcorn, check out Purdue University's horticulture page on broomcorn here.

Friday, November 27, 2015

Wild Food Dinner!

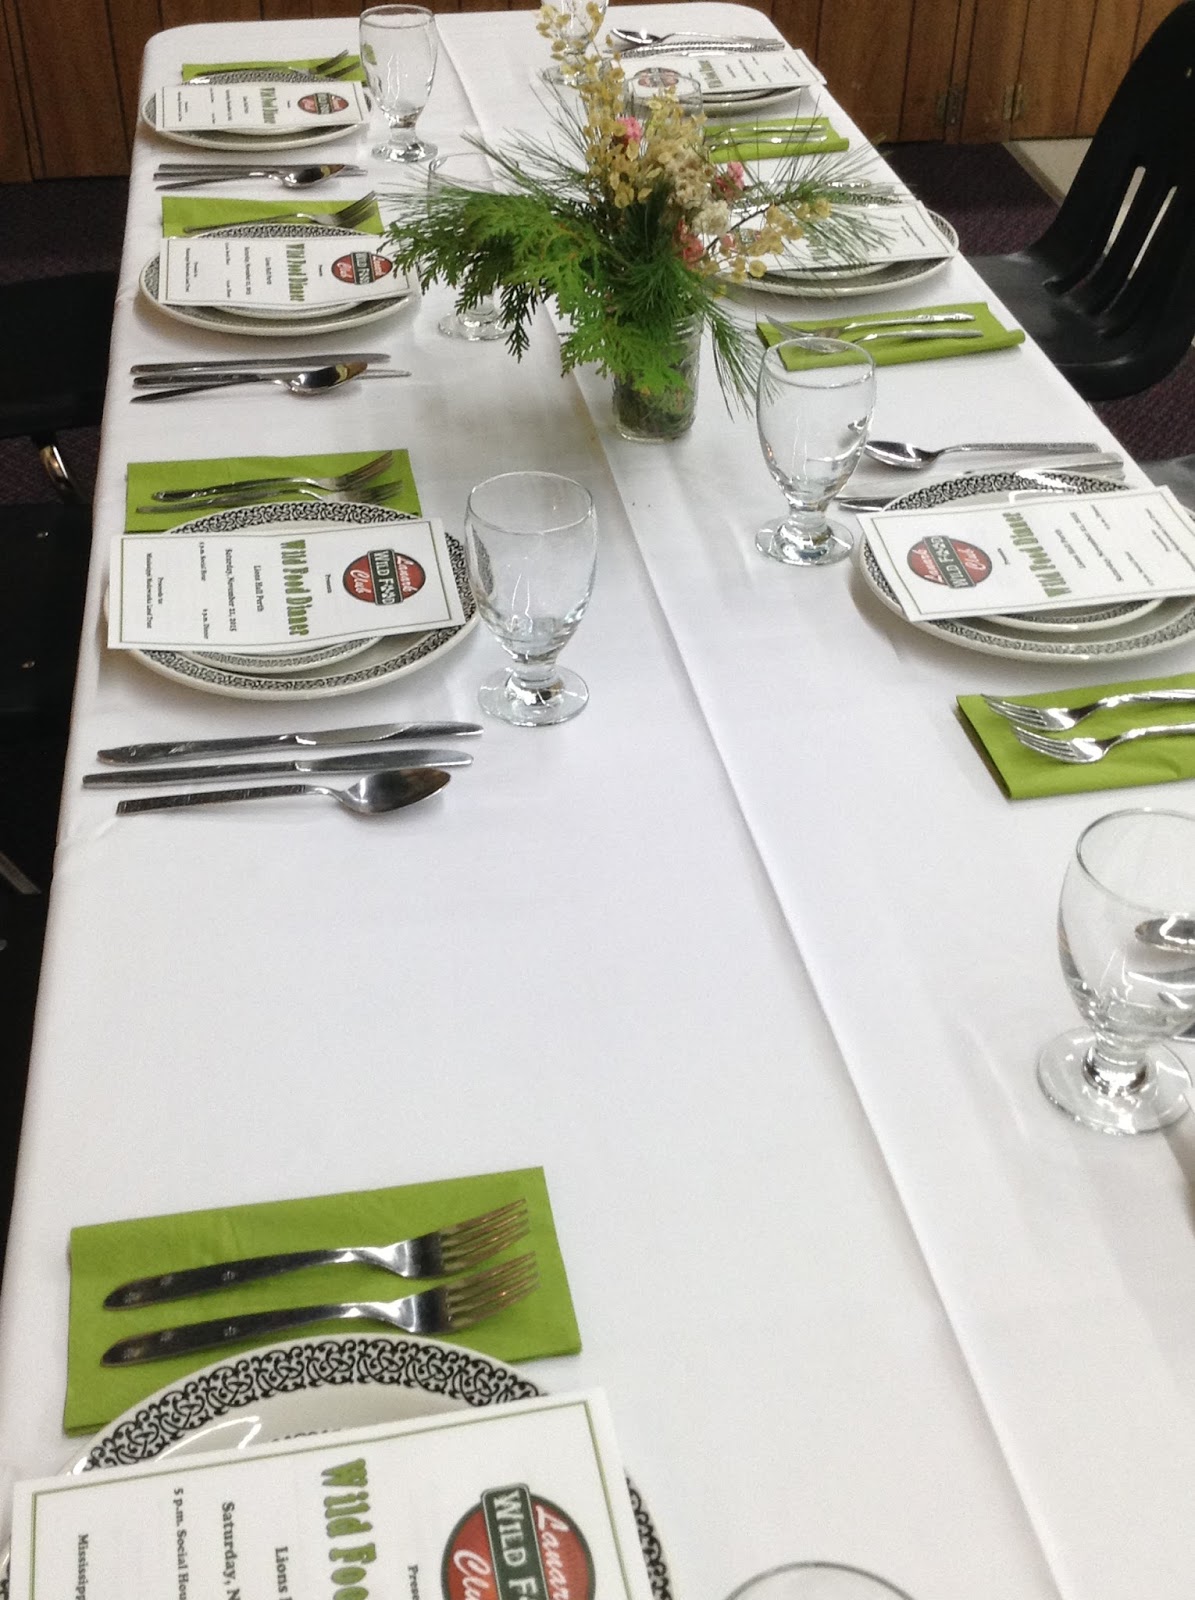
I was fortunate enough to join some friends in Ontario, Canada last week at a Wild Food Dinner hosted by the Lanark Wild Food Club.  The best part was getting to try some foods I would never have been able to try!  My favorite by far was the roasted beaver.  Not something found down here in Cape May County. (This will be a photo heavy post!  Though mere words and photos cannot describe the taste.)


The menu was varied and all the food was delicious.  From the appetizers such as wild harvested mushrooms on toast with wild leek ricotta, venison sausage, First Nations smoked trout to the main dishes of venison roast & roasted beaver to the dessert of apple & wild plum strudel.

Wild Picked Mushrooms with Herbed Ricotta

Pickerel Fritter & First Nations Smoked Trout

Halved Baked Potato with fresh Pickerel & Wild Leek Butter

Salad of local bitter greens, fiddle heads, cattail palm, smoked trout, thinly sliced radishes & beets.

Close up of the Fiddle Heads & Cattail Palm
Puree of Butternut Squash & Apple with Apple cider and Maple Cream

Venison Kafka, Wild Blueberries & Local Cheddar

Roasted Beaver with Venison sausage stuffing.

Wild Plum & Apple Strudel

A nice Canadian Charonnay to accompany the entire meal.
 I even won a door prize!  I picked up a book on Edible Wild Plants, which I hope to utilize here at home.

Kudos to the Lanark Wild Foods Club for hosting such a fantastic event, all the foragers, anglers, & hunters who donated the food; as well as to the team of culinary students from St. Lawrence College Centre for Culinary Arts for such a delicious meal.

My friends have been forewarned that I will be making this an annual pilgrimage.  I am so grateful for good friends!


Tuesday, March 10, 2015

Forays into Fermenting!

What is fermentation?  The most common fermentation is lacto-fermentation, whereby food is preserved in a brine that provides an anaerobic (non-oxygen) & acidic environment for the lactobacillus (bacteria - YES, bacteria!) to convert the sugars in the food into lactic acid.  This type of preservation enhances the nutrient content of what is being preserved. BONUS!
 
I have been curious about fermenting for some time now.  My science background unfortunately, has given me just enough knowledge to be paranoid about giving my family botulism, so I never attempted anything.  Food preservation is something I've been dabbling in for several years - canning, freezing and dehydrating mainly. So why not pickling, fermenting, smoking, etc.? (Smoking is in the works.)  I needed to do more research.

Sauerkraut seemed like a very basic place to start.  Why did I even want to try this when I can buy it so readily?  Well, it is just one more skill I wanted to learn.  But do I go it alone?  I just wasn't brave enough.
 
After chatting with a friend, I found out that our local family-owned organic market offers lots of different classes.  In January I took their class on making Sauerkraut, which is part of their "Culture Club" Series. It was extremely easy to do and I was anxiously awaiting what I hoped would be the best kraut I had ever tasted. After 5 days, I unfortunately found mold growing around the caraway seeds that I had added.

Lesson #1: DO NOT ADD SEEDS!

Batch 1 with Caraway Seed.
 
Lesson learned.   Attempt number two was much more successful.  A good friend and her 5 year old son helped me with the mashing.

Batch #2: Success!
 
By the third batch, I was hooked and had upgraded my equipment.  Luckily I remembered to take several photos to document the process. 

Let's get fermenting! 

Equipment needed:
Food grade container(s) (I use glass Ball jars)
Lid(s)
Weight (I use a jelly jar with salt water solution, you can also use CLEAN rocks, a plate, a baggie filled with water, etc. There are many options.)
Cabbage
Sea salt
Potato masher/Kraut Masher/Clean Hands
Optional: Airlock, crock, special fermenting jars


Step one is easy enough. Quarter the cabbage and remove the thick stem. Then shred the cabbage. If you have a mandolin, this works well. A sharp knife will give you nice thin slices. A food processor will lessen the work even further. How fine or course you like your kraut will depend on what you used to shred it.


For every 5 pounds of cabbage you will need 1 tablespoon of sea salt. If you don't have sea salt, any fine salt that is UN-iodized will work. Add the salt to the cabbage. Now for the elbow grease! With your hands you can mash and grind and squeeze the cabbage until liquid starts being released. You can also use a potato masher. Special wooden "kraut mashers" are available but rather costly.  I use my hands - depending on the water content of the cabbage, this can go very quickly.


You can see the liquid at the bottom of the bowl.

Once you have a nice juicy mess, you need to start packing the cabbage down tightly into your vessel. I used large mouth Ball jars. (I splurged on a 1 gallon crock but haven't ventured that far yet!) My latest purchase was a set of special lids with airlocks. The airlock means I no longer have to remember to "burp" the jar to release the gases. Pack all the cabbage down to get rid of air pockets - they will allow for aerobic fermentation which is NOT what you want! - and until the brine (liquid) level is above the level of the cabbage.


Now that all of the cabbage is under the brine, you can put a nice big leaf on top. I found this helped keep the little pieces that float below the brine.
Once I was sure that everything was submerged, I added in a small jelly jar filled with a saline solution (a bit of kosher salt and water) as a weight. Making sure everything was still as I wanted it, and that the upper insides of the jar were free of debris, I added on my new cap with airlock.  Any cabbage stuck to the sides above the brine are likely to mold!  So I wipe down the sides as best I can.  Any signs of mold for me is a "TOSS IT!" situation.  There is no reason to risk it.

  
Jelly jar weight added.
 
Lid secured.

And now we wait.  If you just use the regular canning lids, you will need to "burp" your jars daily.  Do this by just loosening the ring until you hear the little hiss - do NOT remove the lid!  You do not want to introduce air into this. 

This batch was given about 5 days. After 3 or 4 days you can taste some to see how you like it.  I like mine with a bit of bite. 5 days it was still a bit mild. By day 7 it was just right for me.  I took off the airlock and took out the weight and large leaf.  The whole jar with a new lid went into the fridge.  Some people will leave theirs for weeks or even months!  I have not gotten that brave. Next time I will fill the jar a bit more.

I have found that it will continue to ferment, albeit at a much slower rate, in the refrigerator so I must "burp" the jar every few days.  I eat mine right out of the jar!  Good for the probiotics. I also cooked some with some pork meatballs - it was just as delicious.

I am a total newbie at this, but I wanted to share my experiences so far.  Sauerkraut was a great starter project for me.  There is a ton of great information out there.  Talk to friends who ferment.  Look for local classes or get some books from the library.

I have moved on to my next fermenting adventure...brewing Kombucha Tea!  (But more on that later...)

Happy Fermenting!

Wednesday, July 27, 2011

Garden Skirts...

I know, I've not blogged in ages, and NOW I am going to do a short little blog on SEWING...Yes, sewing, with an E not an O.

I am tired of my shorts riding up when I am working in the gardens, so I thought, a knee length skirt should work just as well! But after shopping and shopping (which I detest - well, clothes shopping) I realized I needed to just make my own.

After a few quick searches of the Internet, I came across a great blog that gives instructions on making skirts out of SHIRTS! Just my cup of tea!

Off to a local store to find some inexpensive shirts that I could put to good use. I purchased plain t-shirts for work skirts and some fancy t-shirts for every day wear!

Here is what I did...not exactly step by step, but you will get the idea and I will also link to the blog I found that inspired me.

First, find a shirt you like - that when you hold it up to you, will make the length skirt you desire. If you like it, and it is super inexpensive ($3-5), I say buy it! Better yet - go to your local thrift stores!


When I got home I washed and dried the shirts, just as I will once the final garment is done.

I laid the shirt out flat on my cutting board. Measured from my waist to where I want the hem to fall (just above the knee in this case) - and added one inch for seam allowance.


At the 21" mark, I cut across the shirt, trying to cut as straight as possible, just at the bottom of the sleeves. Since I am not a pencil, I wanted my skirt a bit longer which meant I had to cut a bit through the bottom of the sleeve. I turned the shirt inside out and ran a seam at the "armpit" to close it up so that the cut shirt was now just a tube.


Carefully folding the edge over to make a 1" seam, I pinned the shirt all the way around, making sure there would be enough room for the elastic later.

Stitch all the way around, but leave one inch of seam undone - so you have room to thread the elastic through. Make sure that you have thread that matches!! My first skirt, I didn't bother filling a new bobbin, and when I had almost finished sewing, I realized I would have a white seam on my brown skirt...on the outside! Oops! Oh well, it is for working in the garden. Who will see it, right?
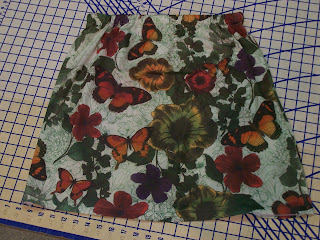


I hooked a LARGE safety pin through the end of the elastic (in order to measure the 3/4" wide, no roll elastic, I held it around the part of my waist where I would wear the skirt, pulled it a bit snug, and cut the elastic allowing for a one inch overlap.). Thread the safety pin around the tube you created at the top of the skirt. It takes a bit of time and patience. Make sure the elastic doesn't twist. When you come back to the end, pull both ends out as far as you can. I pinned the ends, overlapping about one inch, then sewed over the ends and around in a box and then across the box - last thing I need while in the garden, is for the elastic to snap and my skirt to drop! Would NOT be good. Then I fed the skirt back through the machine to close up the slot where I threaded the elastic through.

Et Viola! A brand new skirt!


Here is the blog that inspired me The Shirt Skirt
Check it out!

Wednesday, April 13, 2011

April Showers...

Not sure how many May flowers we are going to be getting out of all this rain, but I hope it is a lot!

My seedlings have been doing well for the most part. I have unfortunately lost all of my turnip seedlings. Left them one day too long and they dried out. I was disappointed in myself, but I will direct sow some this week. The beets I started aren't doing well either, nor the chard. Not sure what is happening with those. Maybe just low germination rate. I will also direct sow them. The sweet potato slips are now in containers with soil - so we will have to wait and see!

Fungus gnats have been a huge problem this season. They may have contributed to the demise of some of my smaller seedlings. I am trying a remedy of my own thinking to try and rid my plantings of them. Instead of paying a ton of money for a product that is formulated to treat for fungus gnats, I got some mosquito dunks (which contain the same strain of Bt that the gnat product does) and put a chunk of a dunk in a gallon of water. I use that to water the seedlings every second watering. I also moved the more infested plants outside - seemed to be more prevalent in the pot that I am trying to root some bay in. Fingers crossed! If it doesn't work, next season I will probably purchase that other product.

Due to business booming, I've not had the chance to do a whole heck of a lot in my own garden. I still need to construct my two new raised beds for veg. And I need to get more things planted out in the hoop house - as it will be coming down in another month! Luckily, one of my clients had a walk-in greenhouse that she never used and was kind enough to give to me, so I've been able to put some other seedlings out there.

I have found out that my thumbs might just be greener than I had thought...as I have been the only one that had success starting our year old Ramapo tomato seeds! I wound up with 61/62 seedlings out of 65 seeds, when at least 2 other people only managed 20 seedlings out of 65! It will cut down on our Master Gardener Association fund raising, as we will be selling the seedlings at Earth Day, but I am glad mine did so well!

Another day of wet weather, means I can take the day off and go work in the hoop house!

Happy Gardening everyone!

Saturday, March 19, 2011

What's Sprouting!

I've got lots of things in the flats that are coming up well.

60+ Ramapo seedlings - for our MGA fund raiser - are all looking good! Not bad for 65 seeds planted (left over from last year).
Two varieties of beets - Detroit Dark Red and Golden
Turnips
Various herbs
Onions
Leeks

Got some things in the salad table - arugula and romaine. Planted some radish seeds out there yesterday.

Also trying carrots - AGAIN! This time in potting soil mixed with vermiculite - in buckets. We'll have to see.

It is a bit late - but got some garlic in the ground finally.

And two buckets planted with blue potatoes - with soil on the bottom and I am going to try just packing the rest of the bucket with straw as the taters grow! I am giving the straw that I am using in the garden this year, to my chickens first, to let them take a day or two to scratch it up and eat up any leftover seeds.

This is shaping up into an exciting growing year! Lots of new seeds to try and several new techniques! Tomorrow I need to get my sweet potato slips in the ground and start the next batch rooting.

Monday, February 28, 2011

Sweet Potato Slips - Step TWO!

Two of the sprouts finally seemed large enough to try rooting. This morning I gently twisted the sprouts from the sweet potato. Then I laid each sprout in a small dish of water, where they will stay until they root - which hopefully will only take a few days.


The other two potatoes do not seem to be rooting well - but they have sprouts. I will monitor them a few more days (now that I've changed their water) and see what happens. If no more growth happens, I may try shaving a bit more off the bottoms to see if that will encourage more roots. Fingers crossed!